Showing posts with label Group Policy. Show all posts

Thursday, February 5, 2009

Disable "Run" for domain users

To disable "run" operation in start menu, do

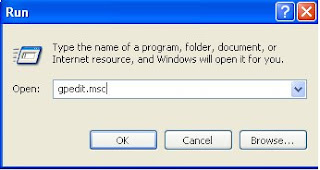
1. Open group policy editor by running the command gpedit.msc
2. In the group policy editor dialog, browse to the node "User Configuration -> Adminitrative Templates -> Start Menu and Run Task -> Remove Run From Start Menu", right click on "Remove Run From Start Menu" and click properties.


3. In the "Remove Run From StartMenu" properties dialog, select enabled.


4. To verify the settings, just run winctrl+r, following errors popsup.


Note: If the domain users is local administrator on a client machine. Then domain user can change the policy.

Friday, January 23, 2009

Set DNS Server group policy through command line

To enable DNS Server group policy through command prompt, run the following command

Assume server ip address to be added are 192.168.1.1,192.168.1.2

reg add "HKEY_LOCAL_MACHINE\SOFTWARE\Policies\Microsoft\Windows NT\DNSClient " /v NameServer /t reg_sz /d 192.168.1.1,192.168.1.2 /f

Set Registration Refresh Interval through command prompt

To enable and to set "Registration Refresh Interval" group through command prompt, one as to set the registry key "RegistrationRefreshInterval" which will hold refresh interval value in seconds.

reg add "HKLM\SOFTWARE\Policies\Microsoft\Windows NT\DNSClient" /v Registrat ionRefreshInterval /t reg_dword /d 1800 /f


To disable it just delete the registry key.

reg delete "HKLM\SOFTWARE\Policies\Microsoft\Windows NT\DNSClient" /v Registrat ionRefreshInterval /f


Relevant Posts:
Group Policy: Enable or Disable registration refresh
set dns zone refresh interval

Enable Connection Specific dns suffix group policy

To enable connection specific dns suffix group policy, do the following,

1. Run the reg add command and set the "AdapterDomainName" registry key to 1

reg add "HKEY_LOCAL_MACHINE\SOFTWARE\Policies\Microsoft\Windows NT\DNSClient" / v AdapterDomainName /t reg_dword /d 1 /f


2. To disable connection specific dns suffix group policy, run

reg add "HKEY_LOCAL_MACHINE\SOFTWARE\Policies\Microsoft\Windows NT\DNSClient" / v AdapterDomainName /t reg_dword /d 0 /f


3. To set connection specific dns suffix group policy to "Notconfigured" then delete the registey key "AdapterDomainName".

reg delete "HKEY_LOCAL_MACHINE\SOFTWARE\Policies\Microsoft\Windows NT\DNSClient" / v AdapterDomainName

Connection Specifix DNS Suffix Group Policy

This policy supersedes the connection-specific DNS suffixes of the computers which are configured locally or configured using DHCP.

To Enable Connection Specifix DNS Suffix Group Policy, do the following.

1. open gpedit.msc on command prompt.
2. In the group policy wizard, browse to the node Computer Configuration - > Admininstrative Templates -> Network -> DNS Client, in the right panel, right click on "Connection Specific DNS Suffix" and select "properties" menu item

3. In the connection specific dns suffix properties dialog, select enabled, enter connection-specific suffix "myrootdns.com" and press apply and finally click OK.


If this policy is disabled
, then Connection Specific DNS Suffix policy is not used.

If this policy is not configured, it is not applied to any computers, and computers use their locally configured or DHCP configured connection specific dns suffixes.

Relevant Posts:
Enable Connection Specific Suffix On command prompt

Enable Register DNS Records Connection Specific Dns Suffix group policy through command prompt

To enable Register Dns Records Connection Specific Dns Suffix group policy through command , just set the registry key RegisterAdapterName to 1

reg add "HKLM\SOFTWARE\Policies\Microsoft\Windows NT\DNSClient" /v RegisterAdapterName /t REG_DWORD /d 1 /f


To disable the policy, run the following

reg add "HKLM\SOFTWARE\Policies\Microsoft\Windows NT\DNSClient" /v RegisterAdapterName /t REG_DWORD /d 0 /f

3. To set the policy to "NotConfigured", then remove the registry key

reg delete "HKLM\SOFTWARE\Policies\Microsoft\Windows NT\DNSClient" /v RegisterAdapterName /f

Enable TTL Set in the A and PTR records through command prompt

To enable the group policy
"TTL Set in the A and PTR records" , run the following command.

reg add "HKLM\SOFTWARE\Policies\Microsoft\Windows NT\DNSClient" /v RegistrationTtl /t REG_DWORD /d 900 /f


To disable or to set as "Notconfigured" just delete the reg key

reg delete "HKLM\SOFTWARE\Policies\Microsoft\Windows NT\DNSClient" /v RegistrationTtl /f


TTL Set in A and PTR Records Group Policy

This policy determines the Time-To-Live (TTL) for A and PTR resource records registered by the host computers.

To Enable this policy do the following.

1. Open group policy editor using command gpedit.msc
2. Browse to a node computer configuration -> Administrative Templates -> Network -> DnsClient and in the right pane right click on "TTL Set in A and PTR Records" policy and select properties


3. In the "TTL Set in A and PTR Records" dialog, select "enabled" option and enter TTL value in the seconds field, press apply and click OK button.


The minimum TTL value is 0 and maximum TTL is 4294967200
by default the TTL value is set to 600.

If this setting is disabled or not configured, TTL is not applied to host computer.


Enable Update Security Level through command line

The following illustrates on how to enable "update security level" through command line

1. To Enable update security level with OnlySecure option run the following

reg add "HKLM\SOFTWARE\Policies\Microsoft\Windows NT\DNSClient" /v UpdateSecurityLevel /t REG_DWORD /d 256 /f


2.
To enable it with OnlyUnsecure, run

reg add "HKLM\SOFTWARE\Policies\Microsoft\Windows NT\DNSClient" /v UpdateSecurityLevel /t REG_DWORD /d 16 /f


3.
To enable it with UnsecureFollowedBySecure, run

reg add "HKLM\SOFTWARE\Policies\Microsoft\Windows NT\DNSClient" /v UpdateSecurityLevel /t REG_DWORD /d 0 /f


4. To set "update security level" to disabled or not configured, delete the registry key

reg delete "HKLM\SOFTWARE\Policies\Microsoft\Windows NT\DNSClient" /v UpdateSecurityLevel


Enable Top Level Domain Zones group policy through command line

To Enable "Update Top Level Domain Zones" group policy on command prompt, set the registry key "UpdateTopLevelDomainZones" to 1
1. On command prompt run the command

reg add "HKLM\SOFTWARE\Policies\Microsoft\Windows NT\DNSClient" /v UpdateTopLevelDomainZones /t reg_dword /d 1 /f


To disable the group policy, do the following

reg add "HKLM\SOFTWARE\Policies\Microsoft\Windows NT\DNSClient" /v UpdateTopLevelDomainZones /t reg_dword /d 0 /f


To set the policy to "NotConfigured", just remove the reg key,


Tuesday, January 20, 2009

DNS Client Disable DNS Registration on command line

DNS Client DNS Registration is also referred to DNS Dynamic Update. To disable "RegistrationEnabled" (DynamicUpdate) run the following on command prompt.

reg add "HKLM\SOFTWARE\Policies\Microsoft\Windows NT\DNSClient" /v RegistrationEnabled /t REG_DWORD /d 0 /f


you can verify that the registry key "RegistrationEnabled" (regedit) to verify the group policy is disabled.


To set DynamicUpdate as "NotConfigured" just the remove the reg key from registry using the command "reg delete".

reg delete "HKLM\SOFTWARE\Policies\Microsoft\Windows NT\DNSClient" /v RegistrationEnabled /f


verify the reg key "RegistrationEnabled" is removed from the registry.

Enable Dynamic Update on command line

To enable Dynamic DNS registration through command line, run the following command


reg add "HKLM\SOFTWARE\Policies\Microsoft\Windows NT\DNSClient" /v RegistrationEnabled /t REG_DWORD /d 1


To verify the group policy applied correctly, check "RegistrationEnable" is set to 1

Saturday, January 17, 2009

Update Top Level Domain Zones group policy

By default, DNS client configured to perform dynamic DNS update will send dynamic updates to the DNS zone authoritative for its DNS resource records, unless the authoritative zone(s) is a top level domain or root dns zone.

Note: root zone is a single label authorative dns zone for all the domains in the organization, and
top level domain is a single label domain. Only one single label
top level domain can be root domain.

If this policy is enabled on a dns client, then the dns client machine will send dynamic updates to the all the dns zones including top level single label dns zones which are authorative for the dns client's resource records except root zone

The following shows enabling Update Top Level Domain Zones group policy.
1. run gpedit.msc on command prompt

2. In the console tree, browse to the node computer configuration -> Administrative Templagtes -> Network -> DnsClient and right on "Update Top Level Domain Zones" group policy and click properties.
3. In the "Update Top level domain zones" group policy dialog box, select "enabled", press apply and click ok button.
If this policy is disabled on a dns client, then the dns client computer to which this policy is applied will not send dynamic updates to the root and/or top level domain dns zones.

If this policy is not configured on a dns client, then it is not applied to any host computers and host computers use their local configuration. To enable on command prompt, visit Enable update top level domain zones policy through command line

DNS Update Security Level Group policy

By default, no security is applied to dynamic updates of DNS resource records. But if this policy is enabled with various options, then secure dynamic update or standard dynamic update for registration of DNS records is applied.

This policy can be enabled with three option values only secure, only unsecure and unsecure followed by secure.


only Securewith only secure option, client hosts send secure dynamic updates only,

Only Unsecure - if this option is chosen then computers send only non-secure dynamic updates but unsecure dynamic updates may be refused by dns servers.

Unsecure followed by secure - if this option is chosen then client computers send secure dynamic updates only when non-secure dynamic updates are refused.


If this policy is disabled
or
If this policy is not configured then it is not applied to any host computers and host computers use their local configuration. To enable this policy on command line, visit
Enable Update Security Level through command line

Register DNS records with connection-specific DNS suffix group policy

This group policy applies only if "DynamicUpdate" group policy is enabled or "DynamicUpdate" group policy is "NotConfigured" and dns client local configuration allows dynamic update.

By default, A DNS client concatenates it's host name with primary dns suffix and performs dynamic DNS registration of A and PTR resource records for the resultant dns client's host name. If this policy enabled, In addition to default A and PTR dynamic dns registration, the DNS client concatenates it's host name with connection specific dns suffix and performs dynamic DNS registration of A and PTR resource records for the resultant dns client's host name.
Note:This policy supersede the connection-specific DNS suffixes set on the hosts configured locally and those configured using DHCP. The following diagram depicts local configuration connection specific dns suffixes.

This policy will be applied on all the network connections of multihomed hosts.

If DynamicUpdate is disabled on a specific network connection on a host, Then this policy settings doesn't apply on that specific network connection. However, policy settings will apply on other network connections.

If this policy is disabled, a DNS client will not register A and PTR resource records with its connection-specific DNS suffix.

If this policy is not configured, then it is not applied to any hosts and hosts use their local configuration as shown below.

See the option "Use this connection's DNS suffix in DNS registration" checked.

To enable this policy, follow the instuctions at Enable register dns connection specific suffix

Friday, January 16, 2009

Enable DNS Client Group Policy "DNS Servers"

The following illustrates Enabling "DNS Servers" group policy.

1. Open group policy editor, using the command gpedit.msc.

2. In left panel, go to the node Computer Configuration - > Administrative Templates -> Network -> DNS Client, and in the right pane right click on "DNS Servers" and press properties context menu item.


3. In the DNS Servers dialog, select "Enabled" button and enter at least one DNS Server IP for example, 192.168.1.1.

DNS Servers group policy

DNS Client Group Policy "DNS servers" determines to which hosts to send queries when the DNS Client attempts to resolve DNS names.

This policy if applied, supercedes all the DNS servers configuration on local hosts and on hosts configured using DHCP. The list of DNS servers of this policy is applied to all network connections of multihomed hosts.

If you enable this policy, you must enter at least one IP address. If more than one ip address to be added, then enter space-delimited list of IP addresses.

If this policy is not configured, then it is not applied to any hosts and hosts use their local or DHCP-configured parameters. To enable this policy, go through Enable Dns Servers Policy

Replace Addresses In Conflicts Group Policy

This group policy allows DNS client to register its A resource record and overwrites an existing A resource record containing conflicting IP address.

This policy apples to DNS zones that do not support Secure Dynamic Update. Secure Dynamic Update preserves ownership of resource records and does not allow a DNS client to overwrite records that are registered by other dns clients.

If this group policy is enabled, then DNS clients will attempt to replace conflicting A resource records during dynamic update.

If this group policy is disabled, then DNS clients will still perform the dynamic update of A resource records, but if the DNS client attempts to update A resource records containing conflicts, this attempt will fail and an error will be recorded in the Event Viewer log.

This policy may have two values: 0x0 and 0x1.
If policy is Enabled then value is set to 0x1.
If policy is Disabled, then value is set to 0x0.

Enable or Disable Registration Refresh Interval group policy

To enable or disble Registration Refresh Interval group policy do the following

1. Run gpedit.msc command.
2. Traverse to DNS client node in left panel tree i.e computer configuration -> Administrative Templates -> Network -> DNS Client
and right click on Registration Refresh Interval and click on "properties" context menu item.
3. In Registration Refresh Interval dialog select enabled option button and enter any value >= 1800 in the Seconds text box
4. To disable "Registration Refresh interval" select "Disabled"
5. To set "NotConfigured" select "NotConfigured" option button press apply and click ok.
Relevant Posts:
Group Policy: set registration refresh interval on command line
DNS Zone: set dns zone refresh interval

Registration Refresh Interval group policy

This group policy parameter determines the Registration Refresh Interval of HOST A and PTR resource records for hosts to which this policy is applied. This policy applies to DNS client which are having dynamic update policy enabled.

If Dynamic Update and this policy enabled, DNS client hosts periodically reregister their records (HOST A and PTR records) with DNS servers, even if the hosts records’ data has not changed. This reregistration with DNS servers is required in order to remove (scavenge) stale records automatically and to preserver the resource records in the storage database.

If the DNS resource records ( A and PTR records) are registered in dns zones with scavenging enabled, then the value of this policy should be below or equal to the configured Refresh Interval value for these zones.

Warning: If the Registration Refresh Interval value is longer than the Refresh Interval of the DNS zones then that may result in the undesired deletion of HOST A and PTR resource records.

This policy may have any value >= 1800 seconds.

If this group policy is not configured then it is not applied to any hosts. To enable this policy, go through Enable Registration Refresh

Design by infinityskins.blogspot